Tuesday, August 23, 2011

New Wheel for the Boat

I found this wheel online at Speed and Marine for $132.00 and fell in love with it.  I installed it this week and was not on the water for more than 10 minutes when a guy saw my boat for the first time and the first thing he said to me was, "I love that wheel", I was really taken back because the first thing that most people say is, "Did you just restore that boat", or "I love your boat".

It feels and looks good.

Thursday, July 21, 2011

The Launch Day


Ted Gauthier's "Zip"
 The day has finally come when I launched my boat.  Things could have not been better..family, friends, the newspaper and photographers were there to join in the fun.  In October 2009 a good friend walked into my office and said he had just returned from a trip up north (Michigan) and he was going to build a boat he saw on the lake and the plan was in popular mechanics.  I said, "that's funny...I have been wanting to build a boat for years, show me the boat".  After a short discussion, I told him (Art Atkinson) that I would build a Glen-L Zip and the boat he needed to build (because of building space requirements, design, performance and style) was the Glen-L Squirt.  He agreed and we both started are builds.  We never dreamed, nor did we try to both finish our boats on the same day but that is exactly what happened.  On July 20th, 2011 we launch both boats.  I am still smiling.

Years ago I built an airplane and the model is a Van's RV-6.  The people who go for a ride in an RV always get what we call.......the "RV Grin".  Well let me tell you first hand....I have the "Glen-L Grin" and I am sure that you will not be able to wipe that Grin off my face every time I jump into my Glen-L Zip.


Art Atkinson and wife Vicki  in their "Squirt"


Ted giving Thumbs Up to Art Atkinson's "Squirt"

Front cockpit of the "Zip"

Posted by Picasa

Tuesday, July 19, 2011

"It's Alive" - Stepping Up - Graphics

Last night was another milestone....I connected all the electronics and turned the key after connecting the water to the motor and she fired right up.  The Honda motor ran great, idle was good and I did not notice any problems.

I did have some electrical issues.  Everything electrical is working in the boat including the new Honda RPM gauge but the lights inside the gauges and the other two gauges ( volt, and fuel quantity) do not work.  I think this may be because I had them powered through the old key switch.  So, I will need to trace the wires back.  I think that they just need a power source.  Same issue with my courtesy lights, no power.  Everything else is working.  Running lights, horn, bilge pumps, stereo, oil level and temp lights are all OK.  I think I have the wiring issue resolved in my mind..I just need to get under the dash and sort it out.  I will also need to run to the nautical department at Auto Zone to pick up a couple of special connectors.

I picked up my graphic for the sides of the boat... "Zip"......This boat was designed by Glen-L and the model is a "Zip".
 
I also installed my birthday and Christmas present from my wife, Lynn.  She had bought me some step pads from Tender Craft out of Canada.  I am glad that I waited until I had my seats installed. I sat in the seats, I quickly realized that if I had mounted them right in the center of the cockpit areas the step pads would have been located right were you would rest your arm.  I think they are installed in a location that will not interfere with your arm resting on the boat and you can easily step into the boat and onto the floor.  I think they really look nice.

Monday, July 18, 2011

Honda Throttle - Radio - Glove Box - Seat supports


It has been a busy weekend.  I have a list of more than 15 items that I would like to get done before I launch my "Zip".  I was able to complete many of the big ones.

mount extinguisher - done
make and installed seat support brackets - done  (the back of the seats were falling off the seat bottom cushions, now these brackets hold the seat backs in position).
remove trailer bunk guides - done (need to buy a different style)
install transom stainless steel trim - done
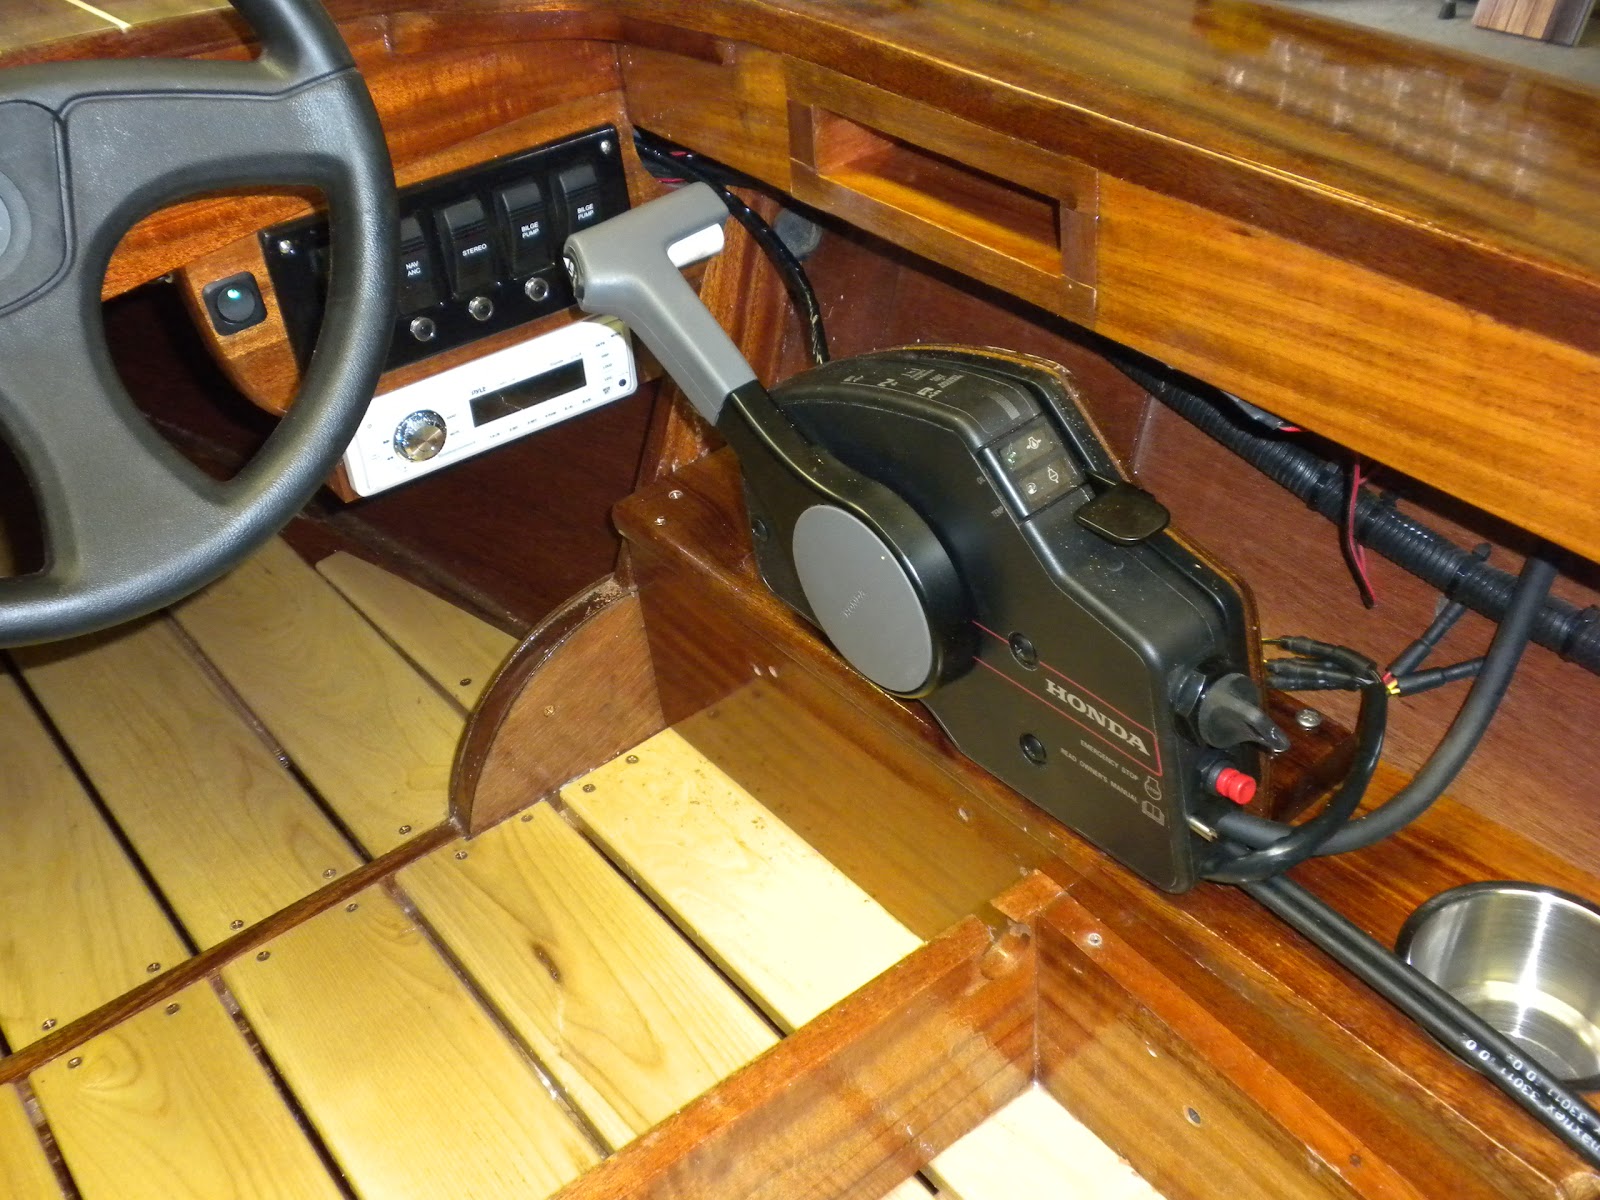
build and mount a new am/fm radio box - done ( the old location was in the way of the new throttle)
build a glove box and install - - done ( removing the radio gave me this spot to store stuff, like my phone/keys)
install trailer plate - done
install hoist cable - done
mount horn - done
secure steering wheel - done

Things to do:

Confirm my boat insurance ( I have a quote but they will not bind the insurance until they have photos,  I have sent them in 3 times but they keep saying they don't have them...the funny part is they received my application).

install interior sides (mount with Velcro)
install step pads
make final electrical connections and test electrical system

hook up water to motor and test run in driveway

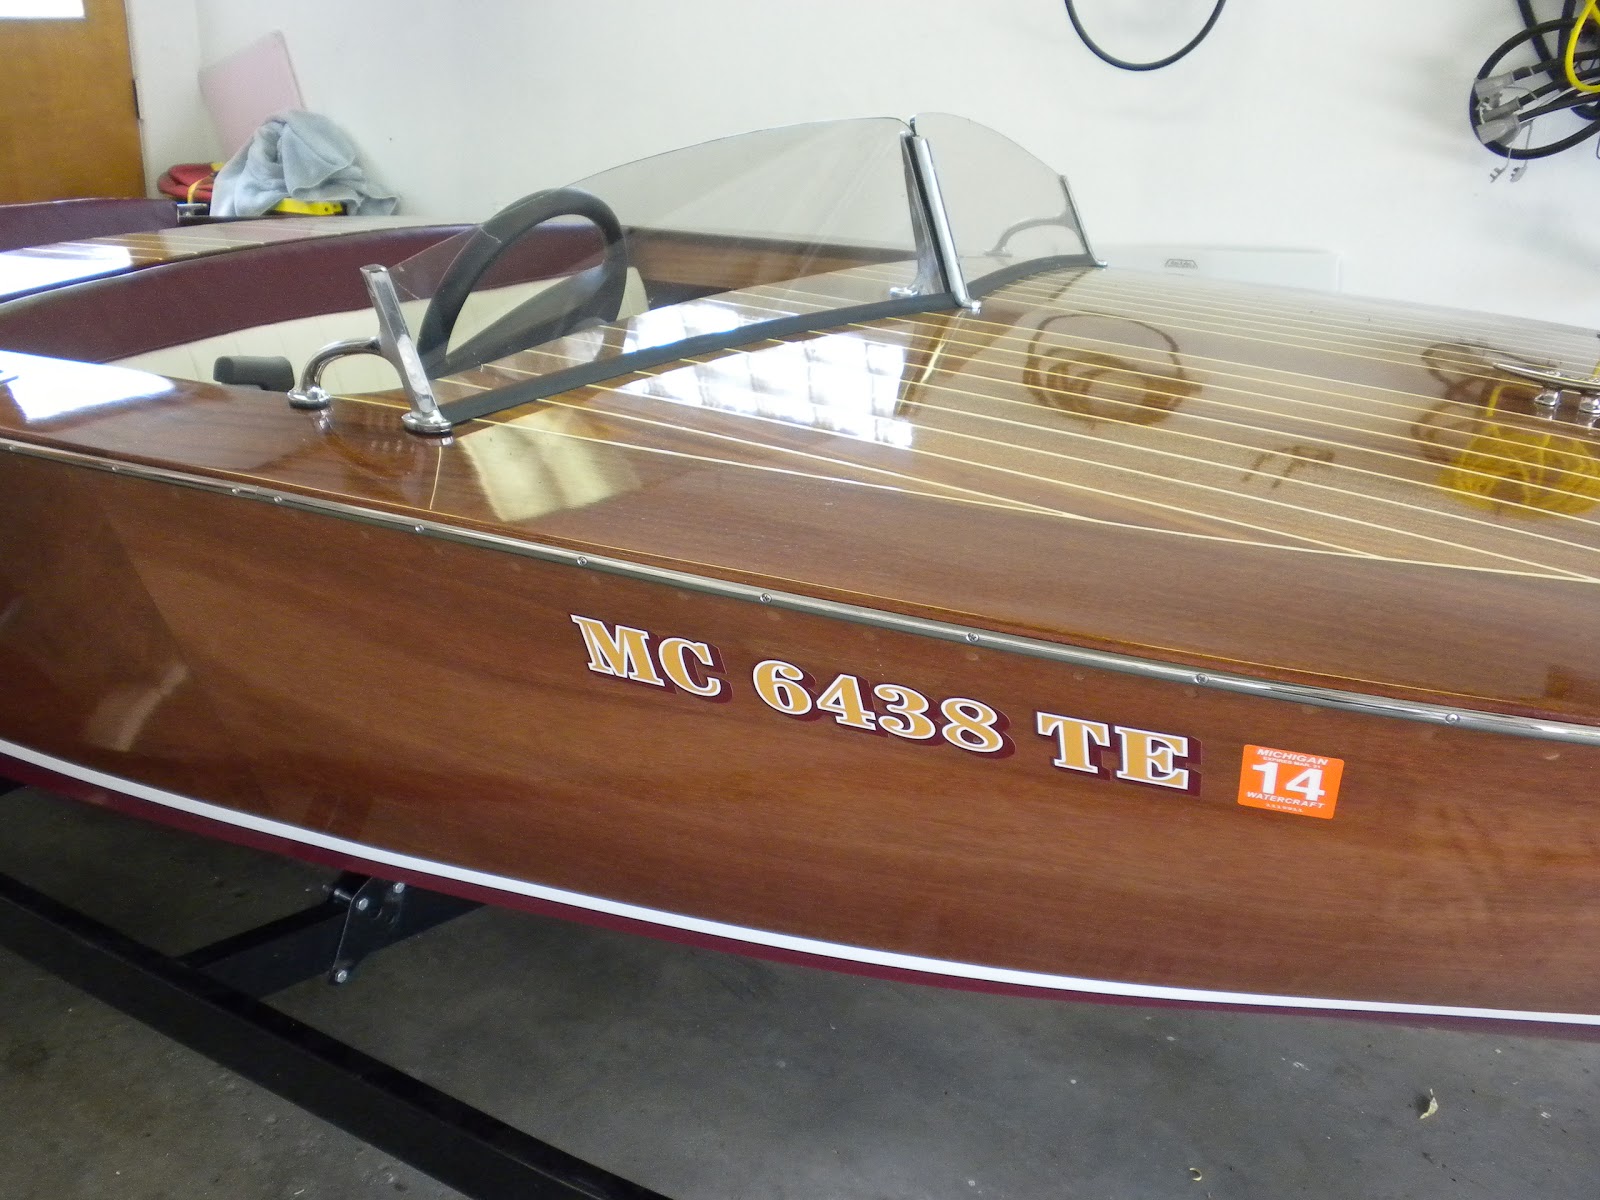
pick up graphics for side of boat and then install

take boat to canvas shop on Tuesday morning to have a mooring and trailer cover made


Things to Buy:

$$  - a new set of trailer guides that are adjustable (the old set were to wide for my boat)
$$  - stern light ( the one I have is 4' tall, I need to pick up a short light)
$$  - rear view mirror
$$  - a short ratcheting strap for the transom ( I lost one when I was coming home from picking up the engine,  I have two large straps that cross each other and keep the boat centered on the trailer.  The short straps are just another safety that keep the stern pulled straight down).

PLAN :

Launch - this Wednesday (if no major issues show up and the boat is back from the canvas shop..if not then Friday after work...Dawn and Mike will also be in town for the weekend..Jimmy Buffet at Pine Knob on Thursday night)  Forecast = 100 degrees on Thursday.

Thursday, July 14, 2011

Windshield Installed

On Saturday my good friend and "Squirt" boat builder Art Atkinson cam over for at least 4 hours and we mounted the windshield and brackets.  It took a long time because it was important to get the correct angle on the brackets so the glass could fit into the grooves on the aluminum casted and chromed bracket.

I am very happy how it turned out.  It really was a two man job and thankful for Art's help.

Wednesday, July 13, 2011

A Squirt is Born

Art Atkinson is building a Glen-L Squirt and had asked me to come over Wednesday evening to help move his Squirt boat out the basement and into the garage.  I would not have wanted to miss this.  Taking it up the stairs and through the kitchen and dinning room and out to the garage.  Yes...Art also made the entire kitchen...it should be featured in Better Homes and Gardens magazine.  For more photos and the story, check out Art's blog:  http://artatkinson.blogspot.com/

Graphics


The look of the boat is really taking shape.  Today I was able to install the white strip above the burgundy paint line and the Michigan Registration numbers.  This thing is really starting to look like a boat.

Sunday, July 10, 2011

The Cutwater

After several months, templates, telephone calls, miles of driving and a lot of hard work the Cutwater and Transom bands are done.  I think they look great. They were hand made by Jim Mathis of Algonac, Mi.  It was impossible to fit the Cutwater to the bow without Jim having the boat on site.  Jim called me on Sunday morning and asked if I could bring the boat to him and I jumped at the opportunity.  The stainless steel Cutwater was made over the winter months from my template but it just did not fit right at the top.
 

I arrived at Jim's home at 12:00 noon and we were not done until 10:30 pm. , no lunch / no dinner but the results are stunning.
Jim still was not satisfied and stated that it would really look good with a Fairleader on top of the Cutwater and I agree, I hope you do.
Jim Mathis used his skill to make it fit perfect.

Saturday, July 9, 2011

Windshield Installed

On Saturday my good friend and "Squirt" boat builder Art Atkinson came over for at least 4 hours and we mounted the windshield and brackets.  It took a long time because it was important to get the correct angle on the brackets so the glass could fit into the grooves on the aluminum casting and chromed bracket.

I am very happy how it turned out.  It really was a two man job and thankful for Art's help.


Friday, July 8, 2011

Bought a New Motor

I started building this "Zip" boat about 19 months ago and at that time I had found a 1962 2 stroke 40 Johnson that I had purchased on Craig's List.  I finally took it to a repair shop and after many discussions I thought I would be happier with a newer motor and a 4 stroke.  I came across a 1999 45hp Honda so I bought it and this motor will be my power source.

There were a few problems mounting it.  The first thing was the dealer, "Dropped it", Yes...there were cutting the bolts off to remove it from another boat and then install it on mine but some how..something when wrong.  Lucky for me and for them...The motor was not hurt and no one was injured.  They were using a fork lift truck to secure the chain but some how it came loose and hit the cement..  Everything appears fine other than a few more scraps and dents.

The second issue was the mounting bolts..one of the bolts were directly behind my gas tank so I had to take all the mounting brackets off and remove the tank to get the bolt thru the transom.  An hour later that was done.

The last problem was the extra thickness of wood that I had epoxied inside the transom.  The mounting bolts were located near the edge so my brother Marty machine a spacer/washer out of solid piece of aluminum and that problem was solved.  My next issue will be mounting the throttle/shifter.

Wednesday, July 6, 2011

Move it "out of the Basement"

It is time to make the move from the basement to the garage.  I completed as much as I could in my basement on this boat build so it is time to buy a trailer and get a bunch of guys together.

My brothers, Guy, Gary, Joey and Danny we all on hand to help.  I was also able to get many friends, Art Atkinson, Howard Barton, my nephew Travis and a couple of neighbors to give the added power.

The night before the move, my brother Guy helped me remove a section of the sun room with a couple of windows and door.  The morning of the move we removed the sliding glass doors giving me the 72" width that I needed.  The "Zip" boat's beam is 5'9".

Because I live on a lake, (Sylvan Lake, Michigan)  and we have a narrow sized lot, I did not have room between my house to bring the boat to the road.  I rolled the trailer between the neighbors homes, three houses down from mine and along the lake shore and back up to the basement.  I was able to roll the trailer into the sun room after the wall was removed.  About 8 guys lifted the boat up and turned it 90 degrees and set it on the trailer.  Then our friend Howard supplied a wheeled dolly for trailer hitch and everyone pushed the boat and trailer across three neighbor lawns and up a steep hill, over the curb and onto the road.

Yes,  I have great neighbors...they let me do the same thing when I finished building my airplane a few years ago.  You just don't see too many airplanes rolling by your picture window overlooking the lake.

Here are a few photos that we took along the way.....enjoy.


Friday, June 17, 2011

Varnish Begins

Yeah....after weeks of sanding, then applying epoxy and repeating this procedure over and over, I am so glad to move on and put the epoxy (and dust) behind me.  I cleaned everything up and began the process of varnishing the boat.  I know from my experience with my kayak that I will also be happy when the varnishing is done because the finish line is near.  Last night I mixed up the varnish with brush thinner and thinned it to 50/50.  I used brush thinner because I read that it helps to keep the varnish wet longer giving you time to spread it out.  I really had to work fast so I did not have any dry spots along the way.   I am expecting to put on between 4-6 coats of varnish.  Each time I will mix the varnish with less and less thinner.  The varnish will need to be sanded between each coat and should take 2-4 days to dry between coats.


I was very happy with this product.  I used Captains Varnish when I did my Kayak and that product gave me all kinds of problems with the biggest one being....orange peel.  I see no signs of that issue..yet. That's a good thing.

I sanded or filled with clear epoxy almost every day for 1-6 hours and this went on for weeks.  I am glad I did not keep track of my time.  I think all the hard work and time really paid off.  The boat finish is not as good as a professional would do but I am very happy with my work.