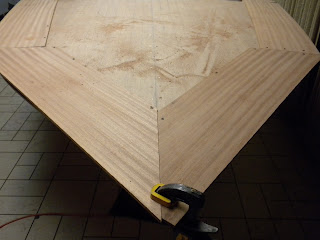
It is time to start putting on the top decking. Covering up my boat project with the final boards begins to give you an idea how she will look.

The first thing I had to accomplish was the layout on the sub deck. I started by drawing out a 2" square grid. I learned the hard way that easier is not always faster. My metal square was exactly 2" wide so I thought that I would just use that width and do all the marking but any small error showed up over a long distance, in fact the measurements were more than 1/2" off by the time I got to the other end of the boat. All that work had to be lightly sanded off and I started over. This time I used a combination of a string, square, laser light and most important was a tape measure. The grid pattern turned out really good the second time around and will give me the lines to measure from so that both sides of the boat layout will be symmetrical.
The next step in the layout process was to figure out the shape, curve and width of the decking boards. My good friend Terry Kohler came by and we spent a good hour completing the layout and doing some of the calculations needed for the spacing. I used a beam compass to layout the curve for the outside boarder. Once the boarder was determined we figured that a 5 5/8" King Plank and 2 1/2" wide boards with 3/16" spacing will fill the interior area.
The outside boarder board measures about 7" wide and all the mahogany used for this area was taken from one 16' long by 10" wide board. Layout proved to be a little time consuming to get all the grain to match as best I could. Part of the problem came from three issues. The first issue I had was the length of the board. The boat is curved and once I laid it out on the curve I only had a couple of of inches of remaining wood. The second issue came when I resawed the 16' board in half. I wanted to book match the grain and once the board was 5/16" thick it cupped a lot in the wrong direction. The third issue I had was a split about 6" long on the end of the 16' board and of course when it was resawed, I now had a split in both boards.
Careful measuring proved that I could cover the areas needed with only a couple of 1-2" scraps. The cupping in the wood was solved by using towels soaked in very hot water and by putting pressure on the boards with a 3rd helping hand stick and 2X4's pressed between the wood and ceiling. I solved the last problem by orienting the boards so the end splits were place in the cut off areas.
The right tool for the job seams to be hand tools. I continue to be amazed how many times I decide that I would rather use a hand tool over a power tool. My outside boarder boards were 16' long and 10" wide and they were to large to fit on my table saw or chop saw without using some major gymnastics to get the correct angle. The easiest way for me to make the joint cuts were to overlap the boards, draw a line, score the grain of the wood with a utility knife and make the cut by hand with a back saw. I am pleased with the cuts and joints I made.
It seems that I always have someone supervising my work. Our Bengal cat, "Storm" looks on.


No comments:
Post a Comment