Sunday, March 28, 2010

Here is the Color


This weekend I began painting the bottom of my boat. I used Supermarine Marine Paint because it came highly recommended by another builder. There were several other reasons, like self leveling, durability, you could apply it with a roller or brush and low odor. The roller application and the low odor were very important because I am doing this in my basement.


I found the color to be just as advertised "low odor", but the primer (664 primer) odor was very strong. Lucky for me, I was able to open the outside door in the Florida room and turn a fan on. That helped a lot. The other thing that was helpful (and important), was my wife was out of town this weekend visiting my daughter in Chicago. Boy, was I glad that I did not have to listen to her saying, "Boy does that smell". I already new that. The smell from the primer went away in 24 hours. Just in time for her return. Life is good.

The paint process is going well. A coat of primer and wait 2 hours and lightly sand. While I was waiting, my brother Gary and I drove to Public Lumber in Detroit and picked up some more Mahogany Plywood. When I returned it was time for the second coat of primer, then 2 more hours to kill so I took off to airport and changed the oil in my airplane. Then it was time to apply the color (300MT Burgundy, SM-1000 Revolution). The color went on great and flowed out nice. Now I will wait for 48 hours, lightly sand and apply a second coat of color.

A couple of things that I did, that worked out good for me were that I lightly sanded between each coat of primer and color with 220 grit paper. I also went to the dollar store and bought a small ladle. Using the ladle was an easy way for me to measure the 10% thinner that I needed to add to the color. Another thing that I was worried about was when to pull the tape. I used the green tape. This green tape is great and leaves a nice line. I painted both coats of primer and the color with the same tape. I waited 30 minutes after applying the color and then pulled the tape off. No problems at all, the tape came off the boat great and no paint came with it.

Several people have asked if I am going to paint the whole boat and the answer is No. Just the bottom of the boat and a few inches on the side will have paint. Everthing else will be Mahogany. I am thinking about adding a small vinyl gold and/or black accent strip between the burgundy and wood.

Sunday, March 21, 2010

Building a Cradle


I had some spare time in the build process because I am waiting a week for the epoxy to fully cure before I paint the bottom of the boat. The timing was perfect to build a cradle which will hold the boat. I will need this cradle to stabilize the boat after it is flipped to the up position which will be done after painting. I am glad that I decided to build it before the paint was on because the epoxy is tuff and can withstand more abuse from the lumber than the paint.


All it took were (5) five 2" X 6" X 8' boards and a small piece of carpeting. This was all fastened together with with 3 and 4 inch drywall screws and staples. I was very happy to see how it turned out and it meet all my goals. It was cheap to build, level, solid and low to ground. I wanted it low to the ground because I know that I will be climbing in and out of it during the build.


Next weekend I will tape off the bottom of the boat and apply two coats of primer and one coat of color. It is getting exciting now.

Wednesday, March 17, 2010

Skeg is Installed


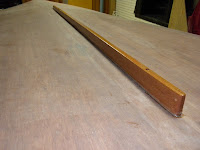
Yesterday I was able to make use of my broken piece of Mahogany used for the Chine. It happened to be just the right length so all I had to do was tapper it from 2" aft to 1" forward, round the corners and install. I used epoxy thickened with milled fiberglass and 2" brass silicon screws to secure it in place. I taped the area around the skeg before a coat of epoxy. This made the cleanup very easy. All I have to do now is fill the screw holes and let all the epoxy cure for a week and then the painting begins. ( I will only be painting the bottom of the boat, the sides will remain with the wood look )

Monday, March 15, 2010

Fiberglassing the Bottom Trailing Edge


The Fiberglass work on the outside of hull is 90% done and 90% to go. That is what every one says when it looks like you are almost done with a project and there seems to be so much more work to do before it is completed. I have been working for the last couple of weeks with fiberglass and epoxy followed by washing and sanding and sanding and sanding....I keep saying, I LOVE SANDING but it does not help. The only thing that does help it seeing the progress being made and how nice the boat is looking.
The one thing that I have been working hard to get right is to fiberglass and sand everything straight and level. If the bottom is not straight and level, I am told you could have issues with the boat propusing and I want to avoid that problem. A very important part of the hull shape is the the bottom edge along the transom. The area where the transom and hull meet needs to be a very sharp edge. When you first lay up your fiberglass cloth over this area the edge is sanded round so the cloth will lay flat and not cause air bubbles under the glass. This is a problem because in high speed boats this area needs to be a sharp edge for better performance. My solution was to tape a scrap piece of wood with duct tape (so the epoxy will not stick to it) and make a form/dam for the epoxy mixed with fiberglass powder to form against. After the epoxy hardened, I pulled the form and all the edge needed was just a little sanding to get just right. Did I mention sanding again. It was very nice to have the boat so close to the wall so I could use some scrape wood to apply pressure against the form. No need for clamps, just a little more duct tape and it was held into position nicely.

Sunday, March 7, 2010

Fiberglassing and Epoxy Resin


What a great weekend to be with my brothers, well almost all of them. Gary and Joey spent their Saturday and Sunday helping with my project which is quickly becoming their project because they seem to be here anytime when I need an extra hand.
When you are fiberglassing you need as many hands as you can get so when my brother Dan stopped by to take a look we also put him to work for a few hours on Saturday. My youngest brother Marty did not come by but I did have a chance to have breakfast with him on Sunday morning before I took my airplane out to burn holes in the sky for an hour and a half. My oldest brother Guy lives in Texas so he has an excuse not to be here helping but he is always there to give me some good advice and put his two cents worth in on the phone or email.


I started last week by applying two coats of MAS epoxy resin and sanding and washing between coats. Saturday we sanded and washed the boat then fiberglassed using 6 oz fiberglass cloth. One guy mixed epoxy and two guys spread it out. On Sunday, Gary and Joey came over and we applied another two coats of epoxy. After it dries (about 24 hrs), the sanding begins. I will sand to a smooth surface, trying not to get down into the fiberglass cloth. Then I will put one or two final thin coats on before we can begin painting the bottom. I have ordered the paint and primer and that should arrive next week.

Thursday, March 4, 2010

Completed the Hull Shape

It is getting exciting now. I can finally see the shape of my boat. My brother Gary and good friend Terry Kohler came over last Sunday and we worked for 4 hours fitting the last piece of plywood into postion to complete the plywood planking on the bottom. It was really special to have Terry come over and help because he gave up part of his birthday morning/afternoon to lend me a hand. Thanks, Terry.

The wood blocks located around the final piece were used as washers to relieve the pressure placed on the bent wood.
After all the plywood planking was epoxied and screwed, the screw holes were filled with famowood filler and joints were sealed with epoxy resin mixed with wood flour filler.
Then I placed a 6" wide fiberglass cloth over all the joint seams and epoxied them in place. Then came sanding or feathering all the seams to smooth service.
I used clear epoxy to encapsulate the entire bottom of the boat.
Next will be to sand the epoxy until I am happy with a flat smooth surface and lay up the entire boat with fiberglass cloth. ( the progress and work done for this post was done over a week period)